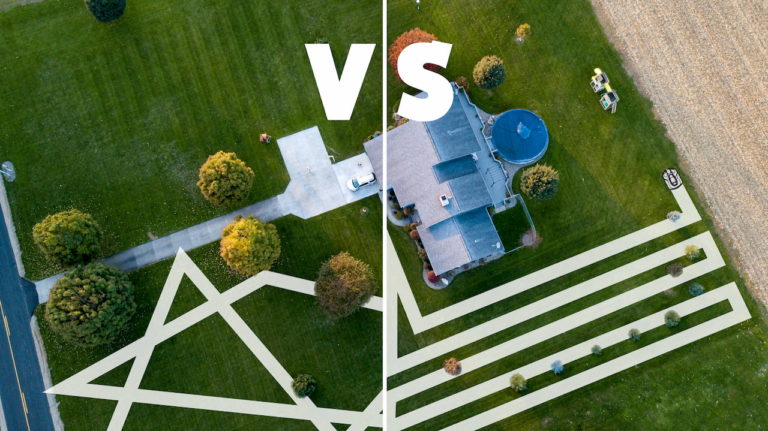
When used correctly, robotic mowers can massively improve the appearance of your lawn and ensure a healthy and well-kept yard. However, in order to make full use of the robotic mower’s potential and obtain this beautiful lawn, you should follow these important tips for lawn care.
Contents
1. Pay attention to the correct temperature and time of day
Mowing at the correct time of day and while the temperature is appropriate is particularly important for lawn care. The best time of day for mowing is either in the early evening or, if you’re using a robotic mower, also in the early or mid-morning. You should take care to mow at these times, especially during the heat of the Summer.
The reason for this is that the lawn is particularly susceptible to drying out after a fresh cutting. The grass loses a lot of water at the cut edge when the blazing sun shines on it and the temperature outside is very hot. The loss cannot be compensated for quickly enough via the roots, which causes the tips to dry out or burn and turn yellow.
You should therefore avoid mowing in extreme heat or in strong sunlight. Especially in Summer, the midday and afternoon are rather unsuitable for mowing the lawn.
In the morning, the lawn may still be wet with dew, which is a problem when mowing with an ordinary lawnmower, but is not necessarily a problem with a robotic mower. But more about this later.
There are other factors that support mowing the lawn in the morning or early evening, which you can read more about in our article “At what time of day should a robotic mower mow?” The following graphic gives a brief insight into which other factors play a role.
It is therefore best to program your robotic mower so that it mows in the morning or early evening.
- Avoid high solar radiation (sunshine) and heat when mowing
- Noon and afternoon are unsuitable times for mowing, especially in Summer
- Mulch mowers have fewer problems when mowing wet lawns in the morning
I have summarized more on the subject of what time of day your robotic mower mows best in this article.
2. Choose the right frequency of mowing
At least as important, if not more important, is the frequency with which you mow the lawn. In general, you can say that you should mow once every two days or so to get a healthy, robust lawn.
Elimination of weeds through frequent mowing improves lawn appearance
By mowing frequently, the lawn is better maintained and various weeds, such as crabgrass, are driven away in the long term. However, this is a slow process, so you should not expect miracles after only one week. In the long term, however, frequent mowing can significantly improve the appearance of the lawn. The lawn will become more dense and foreign plants that have no place there are driven away.
Mowing the lawn frequently will actually save you work in the long run, because you will not have to deal with weeds nor will you have to constantly reseed damaged areas. If you have a robotic mower, then it will take care of the frequent mowing for you.
The robotic mower can mow different types of lawn with the same frequency
The correct mowing frequency depends in part on the type of lawn, i.e. whether it is an ornamental lawn or a utility lawn. This is because the cutting height also varies and different types of grass are used, which in turn grow at different speeds.
However, the use of a robotic mower evens these differences out. Since the robotic mower mulches, it is necessary for it to mow frequently anyway. The amount of grass cut off in one mowing operation would otherwise be too large to compost well. It would then start to rot and promote the development of lawn thatch.
If you are unsure about whether you should get yourself a robotic lawn mower, check out this article where I have listed all the pros and cons.
Mow about every one or two days
Regardless of the type of lawn, your robotic mower should therefore be used every one or two days. During longer dry periods, colder phases, or in the Spring or Autumn, you can mow a little less frequently, as the lawn grows more slowly during this time.
Why you should mow often
- With robotic mowers it’s usually useful to mow every second day
- Frequent mowing reduces weeds and improves the appearance of the lawn
- Frequent mowing saves you a lot of maintenance work
- Robotic mowers are mulch mowers and therefore have to mow frequently anyway
In this article you will learn even more about how often your robotic mower should mow.
3. Set the appropriate cutting height
Even experienced lawn owners often do not realize that it is important to set the correct cutting height when mowing. This determines whether or not your lawn will look healthy in the end.
If you cut your lawn too short, the lawn will become stressed and sustain significant damage. On the other hand, if you cut it too high, it has too little incentive to grow, which can also lead to a poorer cutting pattern.
But what is the correct cutting height? This depends on the type of lawn, the season or the weather and to a certain extent on the use of the lawn. Here I will give you a summary of the most important factors as simply as possible.
Warm Season Grass vs. Cool Season Grass
A first indication of the correct cutting height is whether your lawn is Warm Season Grass or Cool Season Grass. For both types of weather, there is a group of grass varieties that grow under these similar climatic conditions.
Cool Season Grasses start growing in temperatures as low as 41°F and grow fastest between 50 and 77°F in areas that have relatively mild, cool summers. These varieties usually thrive at lower temperatures and remain green even in cold weather. The main growth periods are in Spring and Autumn. They stop growing at temperatures from 80 °F upwards.
Warm Season Grasses only begin their growth when the temperatures hit 50 °F and grow fastest between 77 and 95 °F. In the colder months they usually take on brownish tones. Temperatures below 5 °F are not suitable for most of these species to survive. However, some species can survive temperatures as high as 113 °F.
With Cool Season Grass, cutting height is relatively easy to calculate: if no other factors are taken into account, a good cutting height is 3 inches. The minimum cutting height for Cool Season Grass is 1.5 inches, but you should not mow it that low. Examples of Cool Season Grass are tall fescue, perennial ryegrass, creeping bentgrass or Kentucky bluegrass.
| Tall fescue | 2″ – 3″ |
| Perennial ryegrass | 1 ½” – 2 ½” |
| Kentucky bluegrass | 2″ – 2 ½” |
| Creeping bentgrass* | ½” |
*Normally not found in private yards
With Warm Season Grass it is a little more complicated. Here there are bigger differences between the different species. I’ve listed some of them here:
| Buffalo Grass | 2 ½” – 3″ |
| St. Augustine Grass | 2 ½” – 3″ |
| Common Bermuda grass | 1″ – 2″ |
| Zoysia | 1″ – 2″ |
| Hybrid Bermuda Grass* | ¼” – 1″ |
*Normally not found in private yards
Warm Season Grasses are common in the warmer Southern and Southwestern regions of the U.S., while Cool Season Grasses are used in cooler climates of the Northeast, Midwest or Pacific Northwest.
Adaptation of the cutting height to season and weather conditions
Now you have a rough guide as to how high you should set the cutting height for your lawn. However, depending on the weather conditions, you can continue to make fine adjustments. The most important thing here is what temperatures the lawn has to cope with, how much rain falls and how much light is available during the day.
At high temperatures and with little rain it is better to let the lawn remain a little longer. This way it can cope better with the high temperatures and little rainfall. In a dry, warm phase, you can leave the lawn ½ inch longer.
In more northern regions you should also leave the lawn ½ inch longer in Autumn. The flatter incident sunrays, which are also available for a shorter time during the day, must be used by the blades of grass in the most efficient way possible to produce enough energy to grow. The larger surface on the longer blade of grass counteracts the lack of sun.
The important one-third rule
One of the most important rules is: never cut more than a third of the height of your grass at one time. For example, if your lawn is 5 inches long, you should not cut it shorter than 3 ½ inches. Otherwise, it will do great damage to your lawn. If you need to cut it shorter than the one-third rule allows, give it a few days to recover in between cuttings, then mow again.
Cutting height for wintering
In late Autumn, it’s time for the last cut before your lawn goes into hibernation. It’ll be about time when the temperature doesn’t rise above 41° F for Cool Season Grass and 50° F for Warm Season Grass, which is when the lawn stops growing.
The ideal cutting height for the last cut of the year is 2 to 2 ½ inches. It’s the best compromise between keeping it short enough to keep snow mold away, but long enough for it to not be stressed out by the cold weather.
If you want to know how to adjust the cutting height on the robotic mower and you need more information about which cutting height to choose, read our article Adjusting the cutting height on the robotic mower.
4. Use high-quality blades
Dull blades do not cut the lawn, but pluck it. This neither looks nice nor is it healthy for the lawn. The blades should therefore always be sharp. You can achieve this by always using high-quality blades and not cheap products that quickly become dull. Dull blades also make more noise when mowing. You should keep your blades sharp because:
- Blunt blades pluck instead of cut
- Plucked lawns do not look nice
- The lawn suffers long-term damage and the lawn appearance deteriorates when dull blades are repeatedly used
- Dull blades will cause the mower to become louder
Stainless steel blades with titanium coating have proven to be particularly durable, achieving between 200 and 250 mowing hours. How quickly the blades wear out also depends on the type of lawn, the condition of the ground, and foreign objects that may get under the mower.
In general you should replace the blades regularly. How often depends on the factors mentioned above. Most manufacturers recommend replacing blades on blade discs every 1 – 3 months. The star-shaped mowing crosses, on the other hand, only need to be replaced once per season. The following factors influence the life of the blades:
- Objects lying around like fallen fruit, pine cones, and stones
- Protruding tree roots
- The grass variety (robust varieties = faster dulling)
- The quality of the blades
- The soil properties (e.g. sandy soil = faster dulling)
5. Remove objects from the lawn
As described in the previous point, objects lying around on the lawn can have a negative effect on the blades of the robotic mower. You can probably imagine that stones are not so great for the blades.
On modern mowers with blade discs, the blades give way on hard objects so as not to snap, but they do still wear out. Other robotic mowers with mowing crosses can even break down if you drive over larger stones.
But even “harmless” things, such as fallen fruit, black walnuts, pine cones, or tree roots wear out the blades more quickly. The blades do not really break, but since they are relatively hard objects, they quickly become dull. You wouldn’t use kitchen knives to cut wood, right?
But that’s not all: the mower’s engine also suffers if objects that get into the mower repeatedly cause the rotor to stall a little. Last but not least, the battery is drained more quickly if the robotic mower has to do too much cumbersome work. This can also include having too many leaves on the lawn. Removing objects on the lawn before mowing has the following advantages:
- Protects the robotic mower from damage
- Less wear on the blades
- Less wear on the mower motor
- Less wear and tear on the battery (the robotic mower has to drive to the charging station less often)
6. Avoid errors on slopes
Slopes in the yard are in theory no problem, if you pay attention to a few things. First of all, the robotic mower should be designed for the corresponding gradient. Especially cheaper models can often only cope with gradients up to 25%. Husqvarna models, on the other hand, often manage gradients of up to 45%. In our robotic mower finder you can filter the models according to gradients.
The robotic mower should therefore be designed for the slope, otherwise its engine power is not sufficient to climb the hill or it may tip over when driving up.
But even if the robotic mower is designed for the slope, problems can occur. One is that the wheels spin. This can happen especially in wet conditions. When the wheels spin, the turf is damaged and you get furrows or bare patches on the lawn.
A so-called terrain kit can provide a remedy here. The wheels of the terrain-kit have a deeper tread and thus offer the robotic mower more grip. This is a good way to prevent the wheels from spinning.
Furthermore, on steep slopes it is possible that the robotic mower won’t be able to stop in time at a boundary wire and, due to the momentum when driving downhill, shoots over the boundary wire. Unfortunately it cannot find its way back after this has happened.
When laying the cable, you should, if possible, make sure that you have a level “run-out area” at the end of the cable or, if there is no other way, that you have an obstacle to stop the robotic mower. In this case it is advisable to attach a bumper, or guard, to the robotic mower.
You should avoid these mistakes on slopes
- Having a robotic mower which is not designed for the gradient
- Not using a terrain kit in the case of steep inclines
- Mowing when the lawn on the slope is wet
- Setting up your boundary wire so that your robotic mower can shoot over it after descending the slope
If you are now thinking about getting yourself a robotic mower that is particularly suitable for slopes, my article on this topic will certainly be very interesting for you. In it I explain how to find the right robotic mower for different slopes.
7. Be careful when wet
Should robotic mowers mow in wet conditions or not? This question is being debated. It is recommended not to use a normal lawn mower in wet conditions because the grass does not cut well, as it clumps together and lays over in heavy rain. But does this also apply to robotic mowers?
Robotic mowers have no problems with wet lawns, because they always only cut off the very tip of the blades when mulching. Some models even cut wet grass better than dry grass. However, this is probably not the case with all robotic mowers.
In addition, most robotic mowers are very weather resistant and can mow in the rain.
One disadvantage is that the mower gets dirty more quickly because the grass sticks more easily to the mower deck. However, since the robotic mower should be cleaned from time to time anyway, this can be tolerated.
However, as I mentioned in the previous point, you should refrain from letting the robotic mower drive on steep terrain in wet conditions, as its wheels can spin on the wet lawn and damage the turf. The following can happen in wet conditions:
- Some robotic mowers mow wet grass better, but not all models do
- Almost all robotic mowers can mow in the rain without any problems, i.e. the mower itself will not be not damaged
- The mower will become slightly more dirty
- On steep terrain the wheels can spin and damage the turf
Whether your robotic mower should have a rain sensor or not, you can find out here.
8. Fertilizing with robotic mowers
You might have heard that if you mulch your lawn, you do not need to fertilize it anymore. Unfortunately, that’s not true. The nutrients released from the decomposed cuttings are not sufficient to cover the total nutrient requirements of the lawn. There is a particular lack of nitrogen, which is very important.
Nevertheless, you can save about 30 – 40% of the amount of fertilizer that would normally be used by mulch mowing. To specifically compensate for the nutrient gaps that arise, there are special fertilizers for robotic mowers. These are particularly rich in nitrogen, as this is exactly what the lawn lacks.
If you are using a robotic mower for the first time, you should fertilize twice in the first year, namely in Spring and in the middle of Summer. In the following years it will be sufficient to fertilize just once in early Summer. It is best to fertilize after scarifying or aerating. Therefore, you should also fertilize when you use a robotic mower, because:
- The decomposing cuttings produced during mulch mowing only provide 30 – 40% of the required nutrients
- Special robotic mower fertilizers close this gap
- You get an even denser and healthier lawn
Recently, I explained all of this in detail in the article why a robotic mower does not replace fertilizing.
9. Scarify the lawn
After the lawn has been mowed for the first time in Spring, it should be scarified. But what is that, scarifying? The term originally comes from the English – no wonder, since the English are the lawn experts – and means “to cut vertically.”
A scarifier looks like a lawnmower and cuts from above, rather than horizontally, as a mower does when cutting the grass. This removes debris from the lawn, to prevent or remove lawn thatching. As a result, the grass roots get more oxygen and the lawn becomes more robust.
There are electric scarifiers and manual scarifiers. In most cases, it is sufficient to use a manual scarifier. These sometimes even produce a better result.
- Scarifying should be done once in Spring
- It provides better aeration of the lawn
- The lawn will become more robust and dense
10. Aerate the lawn
If you really want to do something good for your lawn, you can aerate it. This will help the lawn roots receive more oxygen, even in the deeper soil layers, and water will be able to penetrate to the deeper roots more easily.
In principle, aeration involves piercing holes about 1 to 2 cm thick into the soil, through which air can penetrate to the roots. For a long-term effect, the holes can then be filled with more-porous sand to prevent them from being blocked by dirt again. The sand allows air and water to penetrate more easily into the depths of your lawn.
For the home yard you can use for example digging forks or strap-on shoe spikes, or you can buy a special aerating fork. This has special cylindrical recesses in its tines, with which part of the earth can be simply dug out. The holes are not caused by displacement of the soil, which would additionally compact it. This loosens up the soil even better.
For larger areas there are machines called aerators. For domestic use, however, these are rather too large and much more expensive than, for example, aeration forks.
The best time for aeration is between April and September.
Advantages of aerating your lawn
- The grass’s roots are even better aerated than when scarifying
- Air and water penetrate better to the deeper-lying roots
- The soil organisms become more active and thus provide more nutrients for the lawn
11. Avoid errors when laying the boundary wire
When laying the boundary wire you should also pay attention to a few things so that the robotic mower can mow the lawn well. Firstly, it is important that the angles of the boundary wire are not too sharp. Otherwise the robotic mower will not be able to get into the corners very well. It is better to make sure that the corners are slightly rounded and if possible choose an angle not smaller than 90°.
You should also make sure that the boundary wire does not run too close to a power cable. The power cable generates an electromagnetic field just like the boundary wire. This can irritate the robotic mower. It may not be able to reach certain parts of the lawn because, for example, it has already turned around.
If, for whatever reason, you have a lot of power cables running through the yard or under the surface, which could potentially disturb the robotic mower – for example on a roof terrace – it is also a good idea to use a robotic mower without boundary wire. Keep these things in mind when laying the boundary wire:
- No acute angles under 90°
- Round off corners slightly
- Do not lay wires near power cables
- If there are many power cables in the yard, consider using a robotic mower without a boundary wire
12. Create islands
You can also use the boundary wire to create islands around features such as flower beds, large flower pots, ponds, or even just areas of the lawn that you do not want to mow, for example because they are reserved for your rabbits (note that under no circumstances should you let free-roaming rabbits and robotic mowers onto a lawn at the same time). To create an island:
- Branch a wire from the main wire with a cable clamp
- Lay the wire from the edge to the obstacle
- Guide the wire around the obstacle
- Guide the wire back again parallel to the leading wire
- The cables must not cross over each other!
Particularly in the case of obstacles, this offers the advantage that the robotic mower does not hit the obstacle every time, but changes course beforehand. In the long run it would otherwise get scratches at the front.
If you want to know exactly how to create islands with the boundary wire, here I have summarized everything for you.
13. Optimize the edges of the lawn for complete mowing
The edges of a lawn pose a certain problem for robotic mowers. Often some grass remains at the edge, which you have to mow by hand if you don’t want it there. There are robotic mowers with edge mowing functions, but even still, the edge of the lawn is not always finished off as well as one would like it to be.
Grasses that are left on the edge can then grow into whatever is on the other side of the boundary wire, be it a flowerbed or the neighbor’s yard. The manual trimming of the lawn edges with a cordless trimmer is quite fast in small and simply designed yards. In more complex and larger yards, however, this can become quite a large and tedious task.
This can be remedied by laying lawn edging stones. These stones lie at ground level with the lawn and border it on the outside. They thus form a sharp border between the lawn and beds, bushes or ponds. The robotic mower can then drive over the edges of the lawn onto the boundary stones and then can truly reach the edge of the grass. The following advantages are possible when using lawn edging stones:
- Lawn edging stones ensure that there is a sharp border between lawn and beds
- They enable the robotic mower to really mow up to the edge
- You save work if you do not want to trim the edges by hand
In this article you will learn how wide the lawn edging stones should be exactly, because this varies from model to model of robotic mower. I recommend using one of these lawn edging stones.
14. Do not walk on the lawn before mowing
Surely you know this from mowing with your ordinary lawn mower. Even if you use a robotic mower, it is better not to walk on the lawn before, otherwise it will be stomped flat and will not get mowed properly. The blades of grass take a while to spring back into place.
It is best to program the robotic mower so that nobody is on the lawn at the times it mows. This is also safer than, for example, children playing on the lawn while the robotic mower is mowing.
15. Choose a type of lawn for robotic mowers
In principle, robotic mowers can be used on any lawn without any problems. However, there are special grass mixtures that are optimized for short mowing intervals and can cope better with them. In addition, these varieties can absorb nutrients from lawn mulch more efficiently than ordinary lawn varieties.
With the right lawn mixture, you have a lawn that is perfectly adapted to the use of the robotic mower and thrives particularly well. The result is a really well-maintained, green, healthy lawn.
If you want to lay a new lawn, it is definitely a good idea to select a special type of lawn for maintenance with robotic mowers. In a way, this is the icing on the cake of lawn care. If you follow the other tips in this article and choose a robotic mower, you’ll probably soon have the greenest, best maintained, and healthiest lawn you can imagine. The advantages of special grass varieties for robotic mowers:
- Better compatibility with short mowing intervals
- More efficient absorption of nutrients from lawn mulch
- Perfect symbiosis of robotic mower and lawn
EXTRA TIP: Never mow during a frost
And last but not least a little extra tip: My last tip concerns the care of the lawn in frosty conditions. Here you should make sure that you do not mow the lawn from the first frost onwards. Otherwise the blades of grass will be damaged too much when mowing.
The best thing to do before the cold season is to mow the lawn down to about 2 – 2.5 inches during the last mowing operation. This is the best way to get the lawn through the winter.
It is also advisable not to walk on the lawn when it is freezing, unless there is a blanket of snow on top. Then nothing much can happen to the lawn. You should pay attention to these points during the first frost:
- You shouldn’t mow after the first frost
- Before the cold season you should mow the lawn down to 2 – 2.5 inches
- If possible, the lawn should not be walked on when it is frosted over