The guide wire is used by some robotic mowers to find their way back to the charging station. But how is the guide wire actually installed on a robotic mower? Is it difficult? That’s what I wanted to know and here in this article I provide you with the answer, and show you how easy it actually is to install a guide wire.
So how is the guide wire for a robotic mower installed? The installation of the guide wire of a robotic mower is done in several steps:
- Planning of the cable route
- Laying the cable above ground
- Checking the loop
- Testing and correcting the cable route
- Burying the cable
In the following I will explain the individual steps in more detail. In general the steps do not differ much between the different robotic mower models. In detail there may be differences in some places, but these are not a big deal.
If you are not quite sure what the function of the guide wire is, I recently published an article about it.
Contents
Planning of the cable route
Why planning is important
At the beginning you should plan the cable route. This should be done even before laying the boundary wire. The entire installation of the robotic mower should be planned in advance.
This is especially important for two reasons: First, you need to know the distances from the guide wire and the edges of your lawn to the boundary wire. The guide wire must not be laid too close to the boundary wire. For most models, there is a minimum distance of 12 inches between the guide wire and the boundary wire.
On the other hand it is advantageous at the end when connecting the guide wire to the boundary wire if a small loop is left in the boundary wire. This makes it much easier to connect the guide wire to the cable connector. Therefore, when laying the boundary wire, you should already consider where the guide wire will connect to the boundary wire.
How to choose the guide wire path
The guide wire starts at the charging station, runs through the middle of the work surface and is connected to the boundary wire with a cable connector at the end. So far so good. But how exactly should it be laid?
First of all, it is important that you make sure that the cable runs through all parts of your yard. There should be no remote areas that the guide wire cannot reach. Especially areas that can only be reached via narrow passages or corridors should be connected with the guide wire.
Plan to lay the cable in the middle of your lawn so that the robotic mower can find the cable relatively quickly from any position. It is no problem if the cable makes a few detours and curves. Even on long and winding surfaces, you should simply run the cable through the middle of the surface. In very branched and complex yards, a robotic mower with several search cables is a good idea, like some of the Husqvarna Automower models.
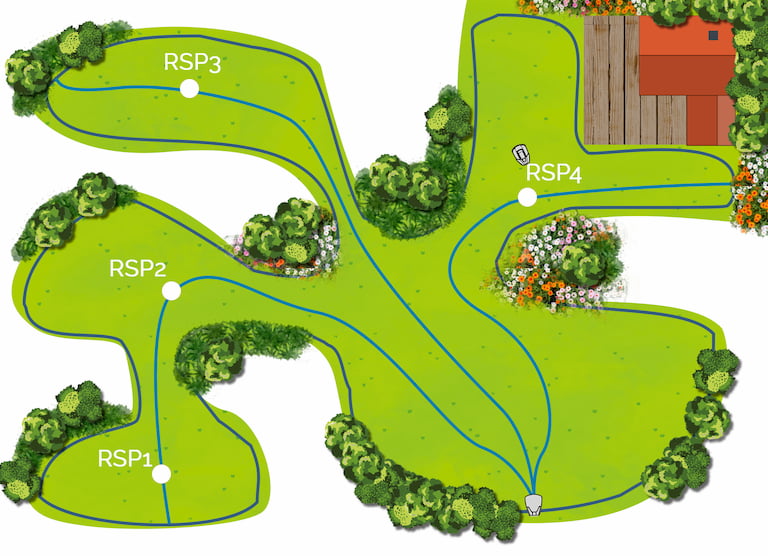
Laying of the guide wires in a complex yard: The charging station was placed on the lower area, because from here all other areas can be reached most easily with the guide wires.
Further tips for choosing the guide cable route
Laying the cable above ground
Before you lay the cable, you should mow the lawn briefly once more, making it easier to lay the cable. When connecting the guide wire to the charging station, leave some extra slack in the cable in case you need to adjust it later. In this way you can move the charging station a little if you need to do so afterwards. Later you can also shorten what is too much.
Connect the guide wire to the charging station (varies according to model):
- Pull the guide wire through a groove on the front of the charging station and run it along the bottom of the station
- On the back is a contact pin, which is usually labeled with the word “Guide”. Here the cable must be connected
- To do this, you take a cable connector, open it and insert the cable
- Press the connector together with pliers until a click is heard
- Cut off the protruding boundary wire 1 – 2 cm above the contact terminal
- Place the connector on the metal pin of the charging station marked with an A
Laying the guide wire
From my point of view, it makes sense to lay the cable above ground at first in order to make corrections afterwards. If the lawn has been mowed short, you can simply lay the cable above ground on top of the grass and fasten it with the fastening hooks. Follow the plan you have drawn up beforehand. The cable should always be pulled taut so that it is not accidentally damaged during mowing.
The boundary wire should always be laid before the guide wire has been laid. In narrow places, make sure that you maintain the necessary distance from the boundary wire and work accurately. You do not need to be so precise if the boundary wire and obstacles are farther away. Therefore, the installation of the cable is usually quite quick, unless you have a lot of narrow spots.
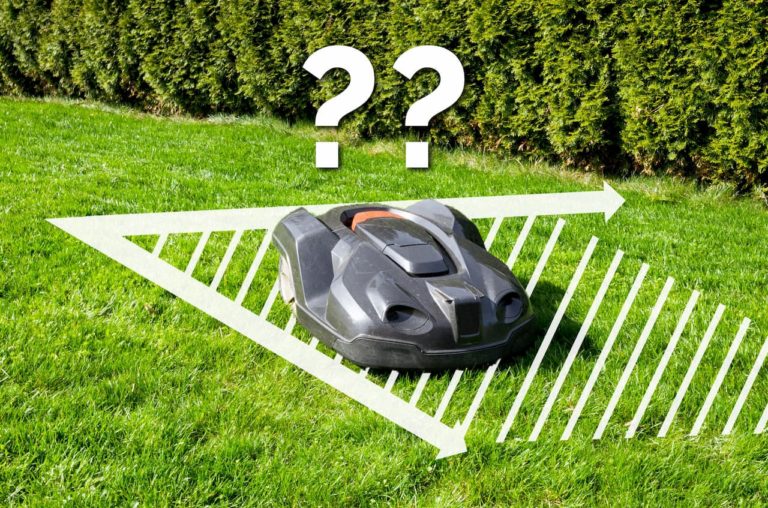
As already mentioned in the planning section, you should not create acute angles if possible, but instead curves or several obtuse angles. At the end, connect the cable to the boundary wire.
Connecting the guide wire to the boundary wire:
- The guide wire should now have reached the point where you want to connect it to the boundary wire according to the plan
- The loop you left in the boundary wire (as recommended above) can now be cut with a pair of pliers or wire cutters
- You can now join the guide wire to the boundary wire using a cable connector (insert all 3 cable ends)
- Slide the ends of the boundary wire into the right and left holes, and the end of the guide wire into the middle hole
- The cables must be fully inserted into the connector (the cable ends are then visible through the transparent part on the other side of the cable connector)
- Press the connector completely together at its hub with pliers
The cable does not necessarily have to be laid underground later. Some robotic mower owners just leave it hooked to the ground like that. The cable sinks into the ground with time and becomes no longer visible. However, there is then a greater risk that the cable will be damaged. Especially if you scarify or aerate your yard, it is better to lay the cable underground in a later step. Before doing so, however, the guide wire must be checked in any case and, if necessary, the course of the cable must be corrected in some places.
Checking the loop
If you have connected the cable correctly and the charging station is connected to the power supply, you can tell if the cable is connected correctly by the LED lights on the charging station. Depending on the manufacturer, this signal can vary. For the two most popular brands that make robotic mowers with a guide wire, Husqvarna and McCulloch, these signals look like this.
- LED lights up green – everything OK
- LED flashes yellow – Guide wire interrupted or not connected
If you have a robotic mower from other well-known brands, such as Worx or Robomow, or are considering buying one, it probably does not have a guide wire. At least I am not aware of any models from these manufacturers that have a guide wire.
If the LED light indicates that something is wrong, check again that the cable is connected correctly everywhere. Especially at the connection points to the charging station and boundary wire. If in doubt, reconnect the cables. If you’re sure you’ve connected everything correctly, but it still shows that the cable is broken, my cable repair article may be able to help you.
Testing and correcting the cable
If the LED light indicates that everything is okay, you can continue. Now it’s a matter of eliminating any problems with the route. You should now test the route with your robotic mower.
Before you put the robotic mower into operation for the first time, the line signal of many models has to be calibrated. It is best to refer to the manual of your robotic mower to find out what needs to be done before operating the robotic mower and which settings need to be programmed beforehand.
To do this, place the robotic mower near the point where the guide wire is connected to the boundary wire. Position it there about 2 meters away from the cable so that it is aligned with the guide wire. Then you send your robotic mower home. Most robotic mowers have a function or button for this.
Now see if the robotic mower follows the search cable all the way and docks at the charging station on the first attempt. It might not make it the first time, so it will try again. If it does not dock properly the first time, you should check the installation again. If it doesn’t find the guide wire, you’ll have to check the installation again anyway.
You can also operate the robotic mower for a while with the cable laid above ground and see if there are any problems in everyday operation.
Laying the cable underground
If you are sure that everything has been installed correctly, and there are no problems finding the charging station via the guide wire, then you can start the underground installation.
It is not absolutely necessary to lay the cable underground. Even above ground it is not visible after some time, because it grows in. However, there is an increased risk of damaging the cable, especially if you scarify your yard. It may therefore make sense for you to lay the cable underground.
To lay it underground, you have to dig a narrow ditch in the ground. There are a variety of tools you can use:
- Edge cutter
- Shovel or spade
- Chain saw with old chain
- Cable laying machine (can be borrowed from your specialist dealer)
Once you have made the ditch, the cable can now simply be sunk into this space. At the end, check the LED lamps of the charging station again to make sure everything is OK. Done!
Related questions
Can the guide wire cross the boundary wire? If islands have been created in the yard using the boundary wire, the question may arise as to whether the guide wire may cross the boundary wire at these points. Most manuals state that this should be avoided. Practice has shown, however, that it usually works anyway. However, the guide wire should cut the boundary wire at a right angle. If the cables are crossed, a test run should be performed.
Does the guide wire have to be installed? The guide wire does not have to be installed to operate. However, the robotic mower works much faster and more efficiently with a guide wire. The installation of the guide wire requires very little effort.
How deep may the guide wire be laid? The cable should not be laid deeper than 8 inches so that the robotic mower does not lose contact with the cable. It may be advisable to lay it as deep as possible to avoid damage.


Can the home wire and boundary wires go under concrete pavers