When you have purchased a new robotic mower and you have completed the installation of the device, the actual setup of the robotic mower takes place. This can be super simple, or a little more complicated, depending on the situation. But I want to encourage you to do it yourself and therefore I will give you an overview of what is actually done during the installation of the robotic mower.
How does the installation of a robotic mower work? The installation of a robotic mower usually follows the steps below:
- Charging the battery
- Setting basic settings such as time and date, or set the PIN
- Adjusting the cutting height
- Calibration run to measure the signal strength of the boundary wire
- Test drives to check the installation
- Setting the mowing times
- Adjusting the anti-theft device
There may be variations from model to model.
There is now a fairly large number of well-known manufacturers of robotic mowers. With some of these manufacturers, the process of installation is very similar or even identical, while there may be certain differences between other manufacturers.
Since I want to illuminate the setup of robotic mowers in general, I cannot go into every single detail here, as this varies from model to model. Instead, I will show you an approximate sequence of the setup, which can be regarded as reasonably general for most models.
Below I will explain some special features regarding the furnishing possibilities of the models of various manufacturers. If there are still any questions left, you can ask me in the comments below.
Contents
Charging the battery
After you have completely completed the installation of your robotic mower, i.e. you have laid the boundary wire and, if available, the guide wire and connected it to the charging station, and you have placed the charging station in an orderly location, the installation of the robotic mower begins. Before doing so, you should check the LED lights on the Base Station to see if everything is in order with the installation.
However, before you can go to the actual setup, you usually have to charge the battery first. Depending on the model, this can take only an hour or less. For other models, 24 hours must be allowed for the initial charging of the battery. With many HUSQVARNA, for example, the first charge takes 60 to 100 minutes, while with ROBOMOW it takes 24 hours. You will find the charging duration for your specific model in the instructions for your robotic mower.
To charge the robotic mower, you must set the main switch, which is usually located on the back or bottom of the unit, to “ON” or “1”. Then push it onto the charging station as far as possible until the charging contacts on the robotic mower and the charging station touch.
Basic settings
After charging (or sometimes during charging), the basic settings can be made. To do this, you need to access the display of the robotic mower, where the settings are made on most robotic mowers.
Many robotic mowers have a large visible button marked “STOP” for this purpose. Pressing it opens the cover under which the display is located. Your model may also have a different mechanism for opening the cover. But at least on almost all models the display is under a cover.
With some robotic mowers, e.g. the models from WORX, the complete setting and configuration of the robotic mower is done exclusively via an app for the smartphone or tablet.
When you switch on the robotic mower for the first time, you will be guided through a menu that asks for several possible settings:
- Possibly: PIN from factory
- Language selection
- Country
- Date and time
- Setting a new PIN
- Define units of measurement and formats (e.g. feet or meters)
Adjusting the cutting height
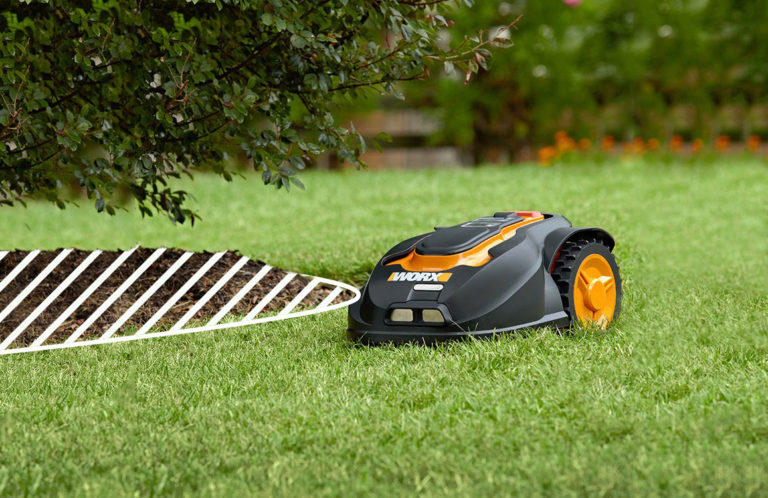
In the next step you have to determine the cutting height of the robotic mower. At the beginning you should set this as high as possible, at least if you have laid the boundary wire above ground. It makes sense to lay the cable above ground at the beginning, as you often want to make corrections.
By setting the maximum cutting height, you prevent the cable from being accidentally cut by the robotic mower. Later, the boundary wire is either laid underground or is so well grown into the lawn that it cannot be cut accidentally. The prerequisite is that you stretch it tightly everywhere and leave no slack.
After one week you can slowly adjust the cutting height. You should proceed step by step, i.e. adjust the cutting height a bit at a time. The lawn does not tolerate being cut much shorter all at once. A rule of thumb: Never cut more than 1/3 of the grass. This is also known as the “one-third-rule“.
And how is the cutting height adjusted? This again varies greatly from one robotic mower to another. The following techniques are available:
- Knob: With the knob under the cover the cutting height can be adjusted in steps.
- Display: On some robotic mowers, the cutting height can also be adjusted via the menu on the display. The blade height is then adjusted electronically by the robotic mower.
- Adjustment knob at the bottom: Some robotic mowers have an adjustment knob at the bottom of the device, which can be turned with a special key (e.g. ROBOMOW). Important: The safety switch of the robotic mower must be set to OFF.
- Bracket at the bottom: Similar to the adjustment knob, here a bow at the bottom is turned with a special key to adjust the cutting height (e.g. AMBROGIO, STIGA) Important: The robotic mower’s safety switch must be in the OFF position.
- Spacers: A few robotic mowers have spacers between the blade and rotor. These must be used depending on the desired cutting height. To do this, the blades must be removed. (e.g. WIPER). Important: The robotic mower’s safety switch must be in the OFF position.
Calibration drive
With some robotic mowers, the next step is the calibration run. This determines the signal strength of the boundary wire. It’s mainly robotic lawn mowers that use a guide wire, that need this calibration step. Most robotic lawn mowers without a guide wire don’t need a calibration drive (especially those sold in the US).
Usually the calibration run is queued up directly after the basic settings. It can also be renewed afterwards via the menu.
Calibration for devices with a guide wire
(e.g. HUSQVARNA, MCCULLOCH)
- Place the robotic mower in the charging station as shown in the display
- The robotic mower then starts calibrating the control system
- It leaves the charging station and follows the guide wire to the junction with the boundary wire and starts mowing
- The robotic mower must follow the guide wire all the way
- If it does not, the guide wire may have been mislaid
- The installation of the guide wire must then be revised and a new calibration must be carried out
The calibration run is followed by various test runs, depending on the model, to ensure that the installation is correct.
Test docking at the charging station
(HUSQVARNA, MCCULLOCH, etc.)
Before your robotic mower can be put into operation, you should test whether it can return to the charging station via the guide wire or boundary wire. For this purpose, the robotic mower is best placed in different positions in the yard. The robotic mower is instructed to return to the charging station via a button, usually called the “HOME button”.
Now you observe how it behaves when it returns. The robotic mower should be able to find its way back to the charging station and dock within two attempts.
If the robotic mower was successful, everything is fine. Otherwise, the installation must be corrected at the corresponding location of the problem.
After the robotic mower has returned to the charging station, one of the two options, Auto or Man, must be selected. This determines whether the robotic mower will automatically continue mowing according to schedule or whether you want to control it manually.
Testing the position of the charging station
(ROBOMOW, et al.)
Before continuing, it is necessary to test whether the position of the charging station is correct. After the basic settings have been set, you will usually enter this mode with the corresponding devices (e.g. ROBOMOW).
You must place the robotic mower on the lawn about 3 m from the charging station in the direction of both the charging station and the boundary wire. Then press “OK” to start the test. All further instructions follow on the display.
Testing the wire position
(ROBOMOW, WORX, et al.)
Mowing robots that have a mowing edge function also test whether the track on the boundary wire can be driven on easily. For this purpose, a test run is carried out in which the robotic mower drives once completely along the outer boundary wire.
Usually the charging station here is not aligned frontally to the lawn, but laterally, so that the front side faces in one direction of the boundary wire and the back side faces in the other direction.
The robotic mower is placed a few meters behind the charging station for the test. After switching on, the robotic mower drives along the entire boundary wire until it reaches the charging station. This way you will know at the end whether your boundary wire has been laid properly.
Setting mowing times
Let’s get to the most important part of the robotic mowing equipment, which you have probably been waiting for. Namely the setting of the mowing times. With many robotic mowers there are already pre-set mowing times, which might be suitable for your yard.
But it may be better if you make the settings yourself. For example, if you have a rather complex yard with several side areas, it is usually necessary to make your own settings.
Even if you have certain preferences, for example that the robotic mower only mows in the morning when nobody is at home and the children are already at school, or if the robotic mower should only mow in the evening. You then have to set this yourself by hand.
For example, you can usually set on which days the robotic mower should mow. You can also set several mowing times per day, on which the robotic mower is allowed to mow. The settings for this can be found in the menu of the robotic mower. Many robotic mowers also have apps that you can use to configure the mowing times.
In general, the robotic mower should mow every day. It is also possible to have it mow only every other day, but then the area output of the robotic mower should not be too small. If you are questioning whether the robotic mower really has to mow every day, I can recommend this article to you.
And when is the best time of day to mow? In most cases, the ideal time of day to mow the yard is in the morning, as there is usually nobody in the yard and many people are at work, so that the robotic mower can do its rounds in peace. But the best mowing time is of course different for everyone.
With a few, very inexpensive robotic mower models, the mowing times cannot be set via the menu or an app, but this is rather rare.
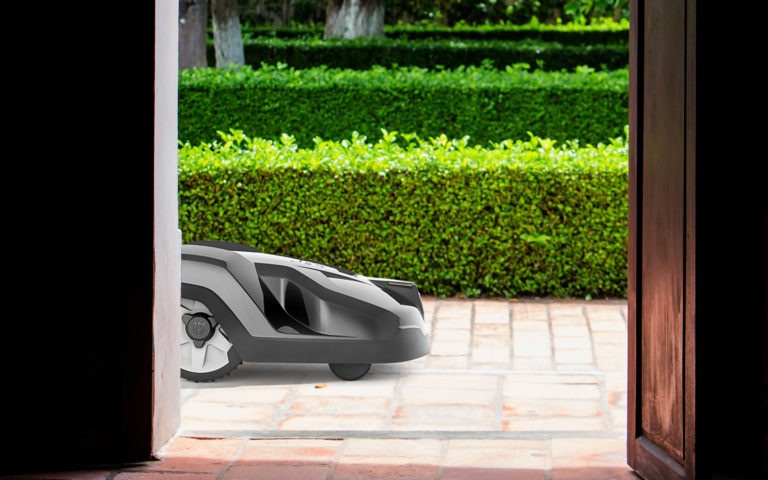
Setting up the anti-theft device
There are a whole range of possible systems for theft protection. Each robotic mower has a different repertoire of security systems. Some of them are already pre-set and active, others have to be activated and set correctly first.
For example, you can turn the alarm function on and off. In most cases you can also set an installation lock with which the robotic mower cannot be installed at other charging stations without entering the PIN.
Some robotic mowers that have GPS can be equipped with a geofence. This allows your robotic mower to move only up to a certain distance from a point you define by coordinates. If it moves too far away, it will sound an alarm.
Possible anti-theft functions include:
- PIN code protection
- Audible alarm signal
- Lift sensor
- Blocking function
- Installation lock
- Time lock function
- GPS Tracking
- Geofencing
You can find a complete overview of the various options for theft protection here.
Optimizations
The settings we just covered were the most important configurations and settings to be made when setting up the robotic mower. But you can make many more optimizations. Depending on the model of the robotic mower, different functions are available to you.
Define remote start points
With many robotic mowers you can define so-called remote start points. These are points on the boundary wire or on the guide wire that the robotic mower can target when it leaves the charging station to start mowing the lawn at a remote point.
This function is particularly useful for complex areas and is useful for configuring the robotic mower to mow secondary areas. You tell your robotic mower on which cable a remote start point is located and how many meters it must follow the cable to reach the point.
So that you don’t have to measure the distance yourself, you can usually send the robotic mower on a test drive where it either shows you the distance or you can set the remote start points directly with a button either on the robotic mower or in an app while driving.
Finally, you can also set the percentage of the weekly mowing time the robotic mower should drive to each individual remote starting point. For many models you can set several remote start points. These are also ideal for navigating the robotic mower through narrow spaces.
Corridor width on boundary wire
With some robotic mowers you can define a corridor on the boundary wire within which the robotic mower will travel when it moves along the boundary wire. Your robotic mower will then always drive at a different distance from the boundary wire.
This is to prevent tracks from forming on the ground along the boundary wire, because the turf is always compressed by the wheels at the same place. Instead, the robotic mower varies its track and there is no damage to the lawn.
Corridor width on the guide wire
For robotic mowers with a guide wire, a corridor can be defined within which the robotic mower should move when it returns to the charging station via the guide wire or when it drives to a remote starting point. Just like the corridor on the boundary wire, this corridor is used to ensure that the robotic mower does not always travel in exactly the same lane, but that the lane varies slightly. This prevents the robotic mower from forming a track on the lawn.
The corridor can also be turned off completely if this causes problems at certain narrow points. In most cases, however, this is not necessary, as robotic mowers with a guide wire often have a function called automatic passage recognition (HUSQVARNA).
This means that you do not have to set the width of the corridor yourself, but the robotic mower organizes it dynamically and adapts it to the environment. If there is little space for a corridor in a bottleneck, it makes it smaller so that the robotic mower cannot create a corner when passing through.
Automatic operation
In automatic mode, the robotic mower organizes its own mowing plan. On the basis of various settings for the lawn, the robotic mower decides how often it has to go out to mow and when it is best.
The automatic mode can also be restricted at certain times via “Inactive time”. Mowing-free days are also possible and the function can be temporarily switched off for certain zones. Among others ROBOMOW robotic mowers are equipped with this function.
Configure adjacent areas
Other names for this are also:
- Zone settings
- Lawn cover
- Multizone function
This allows you to configure different secondary areas which the robotic mower should probably always approach from the charging station. For the settings, it is necessary to set remote start points as described above.
If several areas are connected by narrow passages, i.e. if they are different areas, the area where the charging station is located is called the main area and the other areas are called adjacent or secondary areas.
During normal operation, the robotic mower may not find the other secondary areas. It is therefore necessary to configure secondary areas in the settings of the robotic mower. In this way, it can then always control them according to a specific plan.
If you are interested in the subject of robotic mowers on different surfaces, you should definitely read this article.
GPS car
(HUSQVARNA X-line, some AMBROGIO and WIPER robotic mowers)
Above I mentioned that you can configure secondary areas or the control of remote start points with a percentage value, according to which the robotic mower controls these areas. For example, you can say that secondary area A should be mowed in 20% of cases.
Some robotic mowers are equipped with GPS navigation and create a digital map of your yard during the first days of mowing. They can then use this to remember where they last mowed and when. The speed of growth of the lawn can also be taken into account using the weather bucket/growth sensor.
The GPS car function, as it is called in HUSQVARNA robotic mowers, for example, saves you the trouble of setting the percentages, because the robotic mower organizes itself to approach the various areas as soon as it deems it necessary. Its digital map helps it make the right assessments.
Set mowing pattern
(HONDA, et al.)
With some robotic mowers you can set the mowing pattern according to which your mower should drive. For example, with HONDA there is the possibility to change between several mowing patterns. Here there are the following choices:
- Random mowing
- Orderly mowing
- Mixed
The random principle corresponds to the normal mowing pattern used by most robotic mowers. In orderly mowing, the robot makes more even and sharp turns on the boundary wire and moves in a zigzag or ping-pong pattern between the two sides of the boundary wire.
Activate/deactivate rain sensor
Some robotic mowers have a rain sensor with which they can detect whether the lawn is wet or not. Even robotic mowers are quite weatherproof these days, it can be useful under certain circumstances not to let your robotic mower mow when it is wet. For example, it can get into trouble on steep inclines and the wheels will spin and dig up the ground.
Even particularly heavy robotic mowers should not mow in rain or wet conditions, because their weight can then also dig up the ground. In addition, robotic mowers get dirtier in the rain. Some robotic mowers also become louder when they mow wet grass.
But there are also arguments for mowing in wet conditions. Not all robotic mowers have problems mowing in the rain- some even mow wet grass better than dry grass. It is also possible that the robotic mower does not mow the grass regularly enough in constant rain because it always stays in the charging station.
This can have negative consequences for the cutting pattern. Here you can find an extensive article by me about the sense and nonsense of rain sensors and their activation/deactivation.
Charging station search
Mowing robots that have a guide wire in addition to the boundary wire can find their way back either via the guide wire or the boundary wire. Here you can usually set which cable they prioritize and after how many minutes they search for the other cable if they don’t find the one.
In addition, some charging stations have different radio signals with which the robotic mower can find the charging station. Some have a close signal that is always active and only reaches about one meter, and a remote signal that reaches about 10 meters and can be switched on or off.
Sometimes the remote signal can cause problems navigating to the charging station if there are obstacles in the vicinity of the charging station. In this case it may help to switch off the remote signal.
If you want to know more about how the robotic mower finds the charging station, read on here.
Setting the external offset of the robotic mower from the boundary wire
The robotic mower does not stop immediately at the boundary wire, but always drives over it a little bit, so that it can also mow so that it can make sure it gets the edge. For this reason, the boundary wire must not be guided directly along the edge, but must always have a certain distance to the edge, which varies depending on the outer boundary (between 2 and 14 in).
Here you can fine-tune and adjust how many inches they can drive over the cable on some robotic mowers. By the way, this can also be helpful if you originally installed the boundary wire for another robotic mower that needs different distances and you now have a new model from another manufacturer but want to use with the old boundary wire.
ECO Mode
(HUSQVARNA, et al.)
The ECO mode is used to switch off the loop signal when the robotic mower is in the charging station to save power. But it also has other advantages.
For example, if there are other wireless devices in the vicinity that are disturbed by the induction field of the loop cables, such as inductive hearing systems or automatic garage doors, it may make sense that the loop signal of the robotic mower is only active when the robot is mowing.
However, the robotic mower can then only be started from the charging station and not in the working area. There are some restrictions in operating the robotic mower when it is in ECO mode. It is best to read the instructions for your robotic mower.
ECO mode
(STIGA)
Not to be confused with the ECO mode I just described. In ECO mode the robotic mower returns earlier or drives to the next zone if it detects that the lawn has already been mowed. It does this via a special sensor.
Related questions
What does the installation of a robotic mower cost? The installation of a robotic mower can be carried out by an installation service and costs from $200 upwards. The price depends primarily on the size of the area. The type of installation, i.e. whether it is above or below ground, also has a minor influence on the price.
Can the charging station be placed outside the lawn? The Base Station can be placed outside the lawn under certain circumstances. In this case, the boundary wire must be led to the Base Station at a certain angle so that the robotic mower can find its way smoothly into the Base Station. Under no circumstances should it be routed under the Base Station.
Also interesting: Robotic mower charging station outside the lawn: Is that possible?